Endpoints
An endpoint is a connection to a single industrial device or system. The agent polls it on a fixed interval and forwards the readings to any destinations you've wired up via subscriptions.
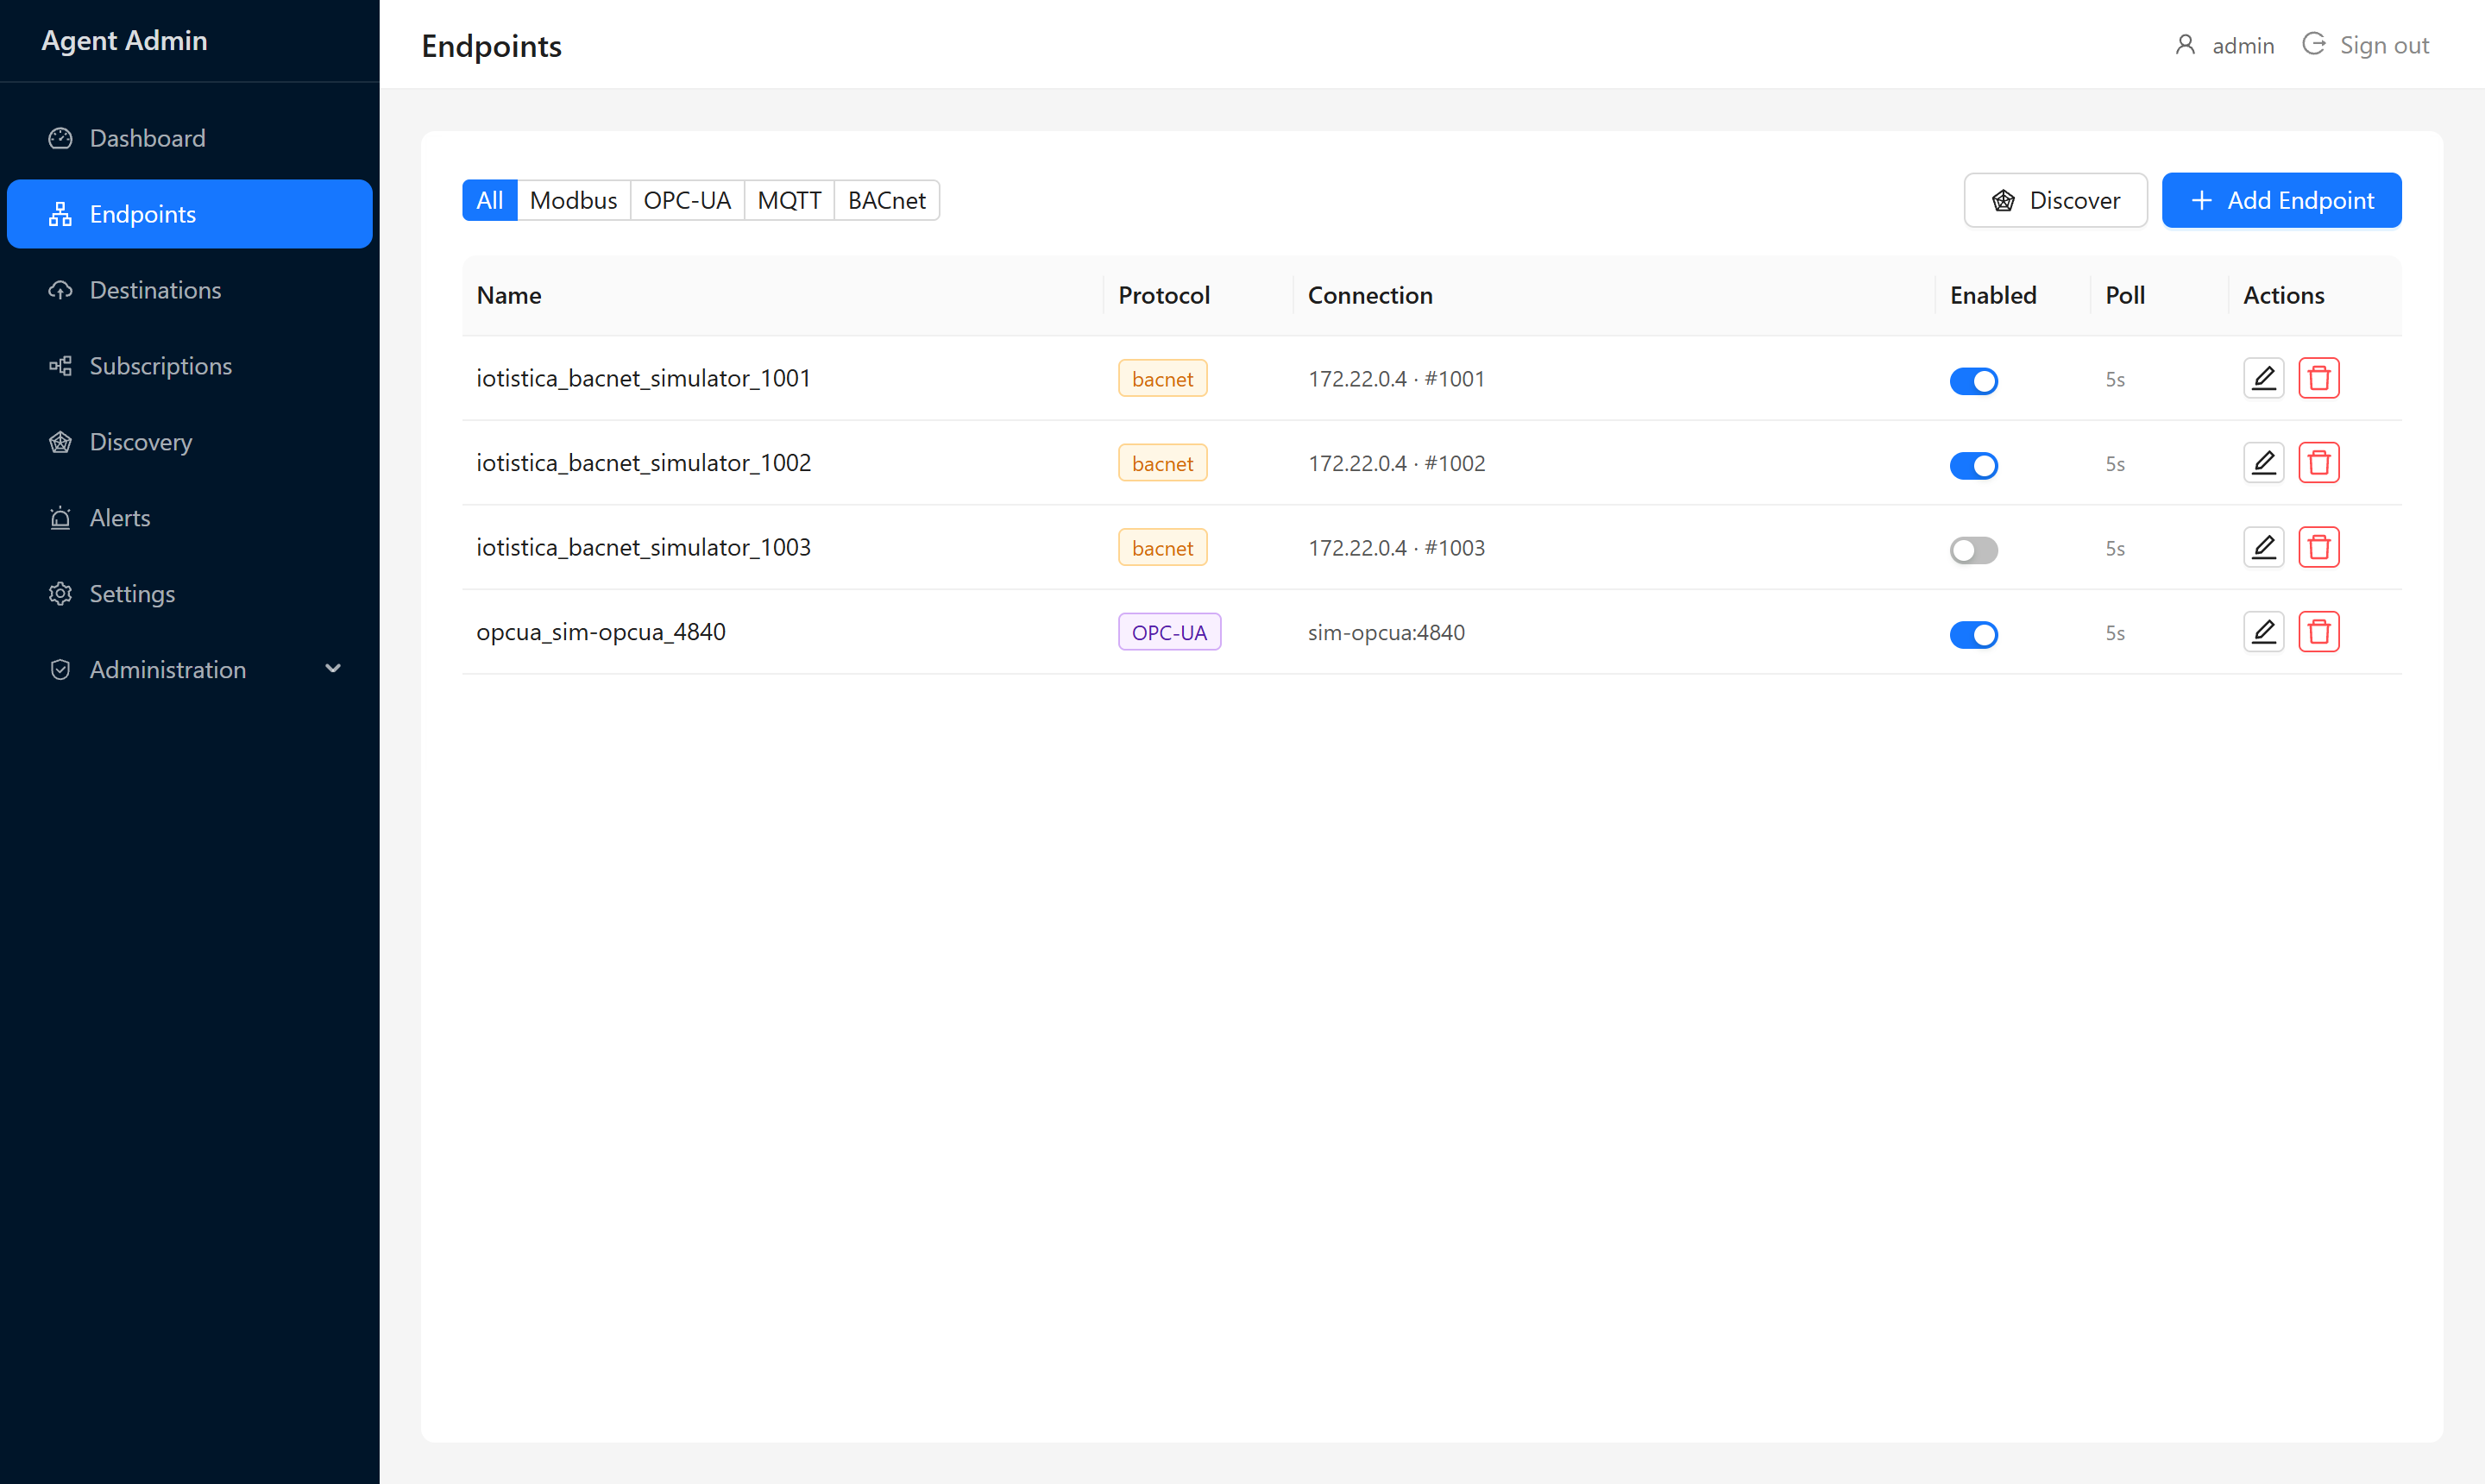
The Endpoints page shows all configured endpoints in a table with their protocol, connection summary, enabled toggle, and poll interval. Use the All / Modbus / OPC-UA / MQTT / BACnet filter buttons at the top to narrow the list when you have many devices.
Adding an Endpoint Manually
Click Add Endpoint in the top-right corner. A drawer slides in from the right with the following fields.
Step 1 — Name
Give the endpoint a descriptive name. It appears in the table, in subscription dropdowns, and in data payloads. Examples: Warehouse Chiller 1, Boiler Room Modbus, HVAC Controller.
Step 2 — Protocol
Pick the protocol your device speaks. The connection fields below change depending on what you select.
Step 3 — Connection
Fill in the connection details. These depend on the protocol — see the per-protocol sections below.
Step 4 — Options
| Field | Default | Description |
|---|---|---|
| Poll Interval (ms) | 5000 | How often to read from the device. 5000 ms = every 5 seconds. Lower values give fresher data but increase load. |
| Enabled | On | Uncheck to add the endpoint without connecting immediately. |
Click Add Endpoint to save. The agent connects to the device and starts polling right away.
Modbus
Modbus is the most common industrial protocol. The agent supports both TCP (Ethernet) and RTU (serial).
Modbus TCP
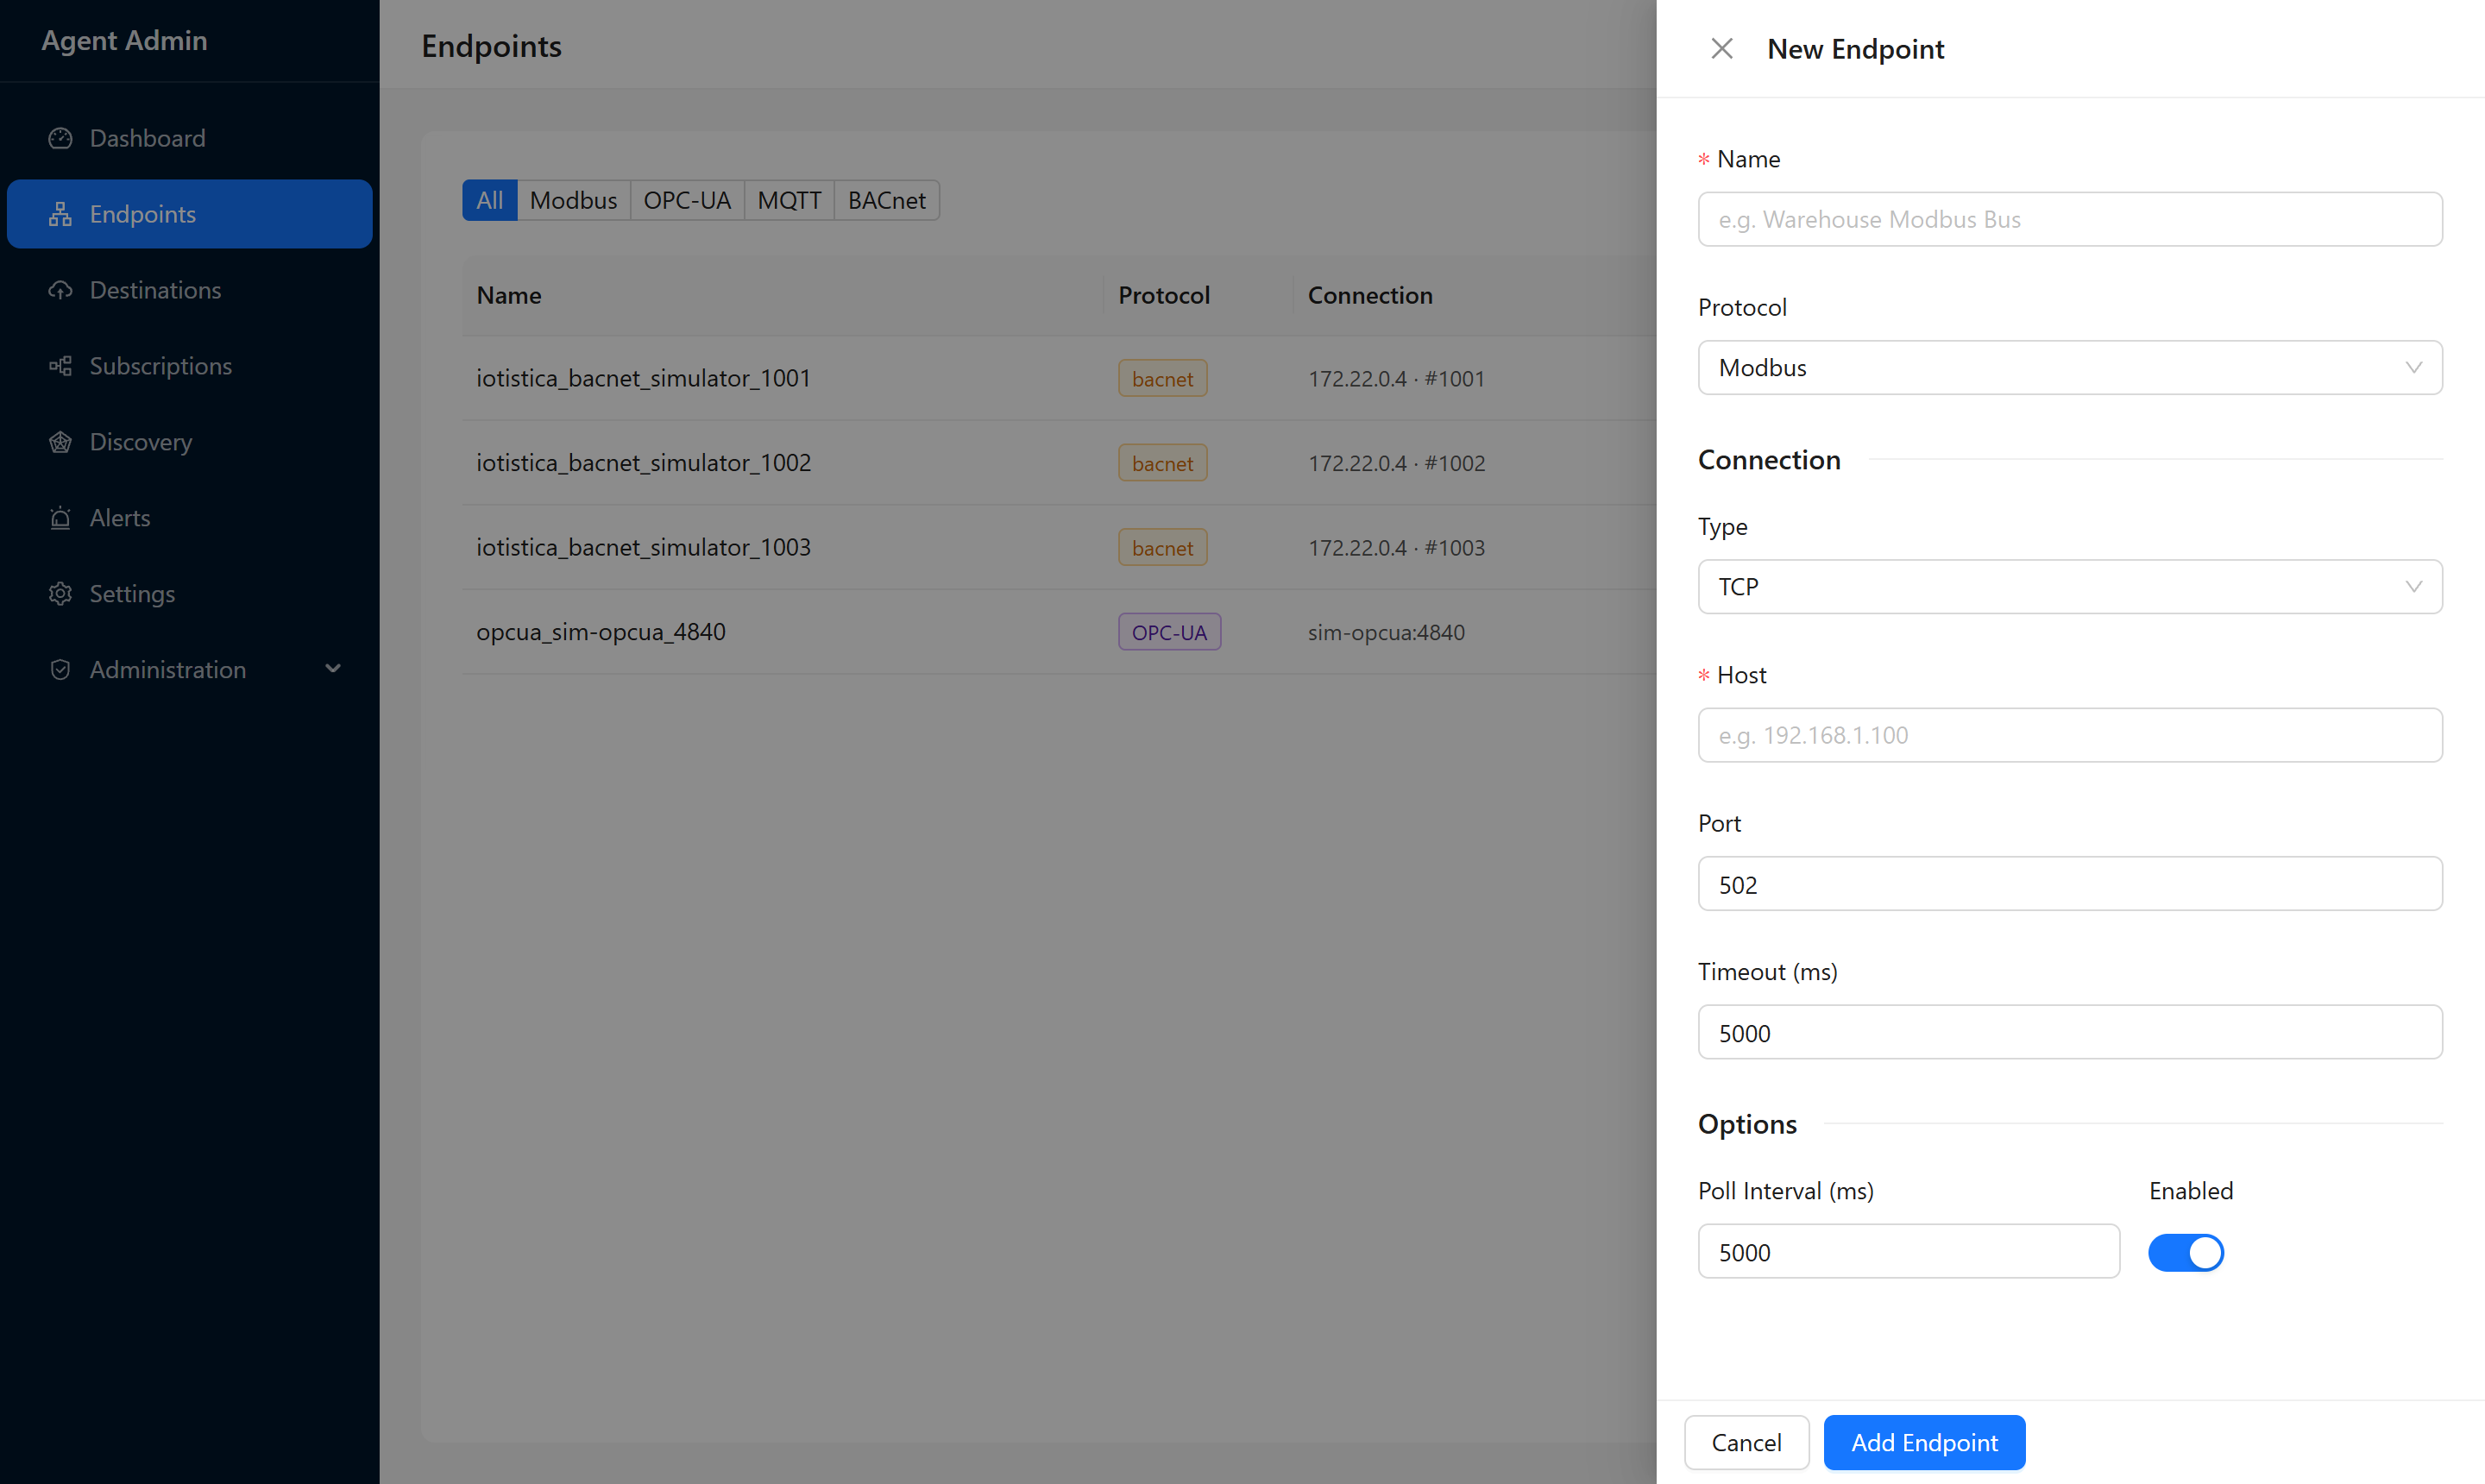
Used for devices connected over Ethernet or Wi-Fi.
| Field | Default | Description |
|---|---|---|
| Type | TCP | Select TCP |
| Host | — | IP address of the Modbus device, e.g. 192.168.1.100 |
| Port | 502 | TCP port. Almost always 502. |
| Timeout (ms) | 5000 | How long to wait for a response before giving up |
Example: A power meter at 192.168.1.55, port 502.
Type:    TCP
Host:    192.168.1.55
Port:    502
Timeout: 5000
Modbus RTU (Serial)
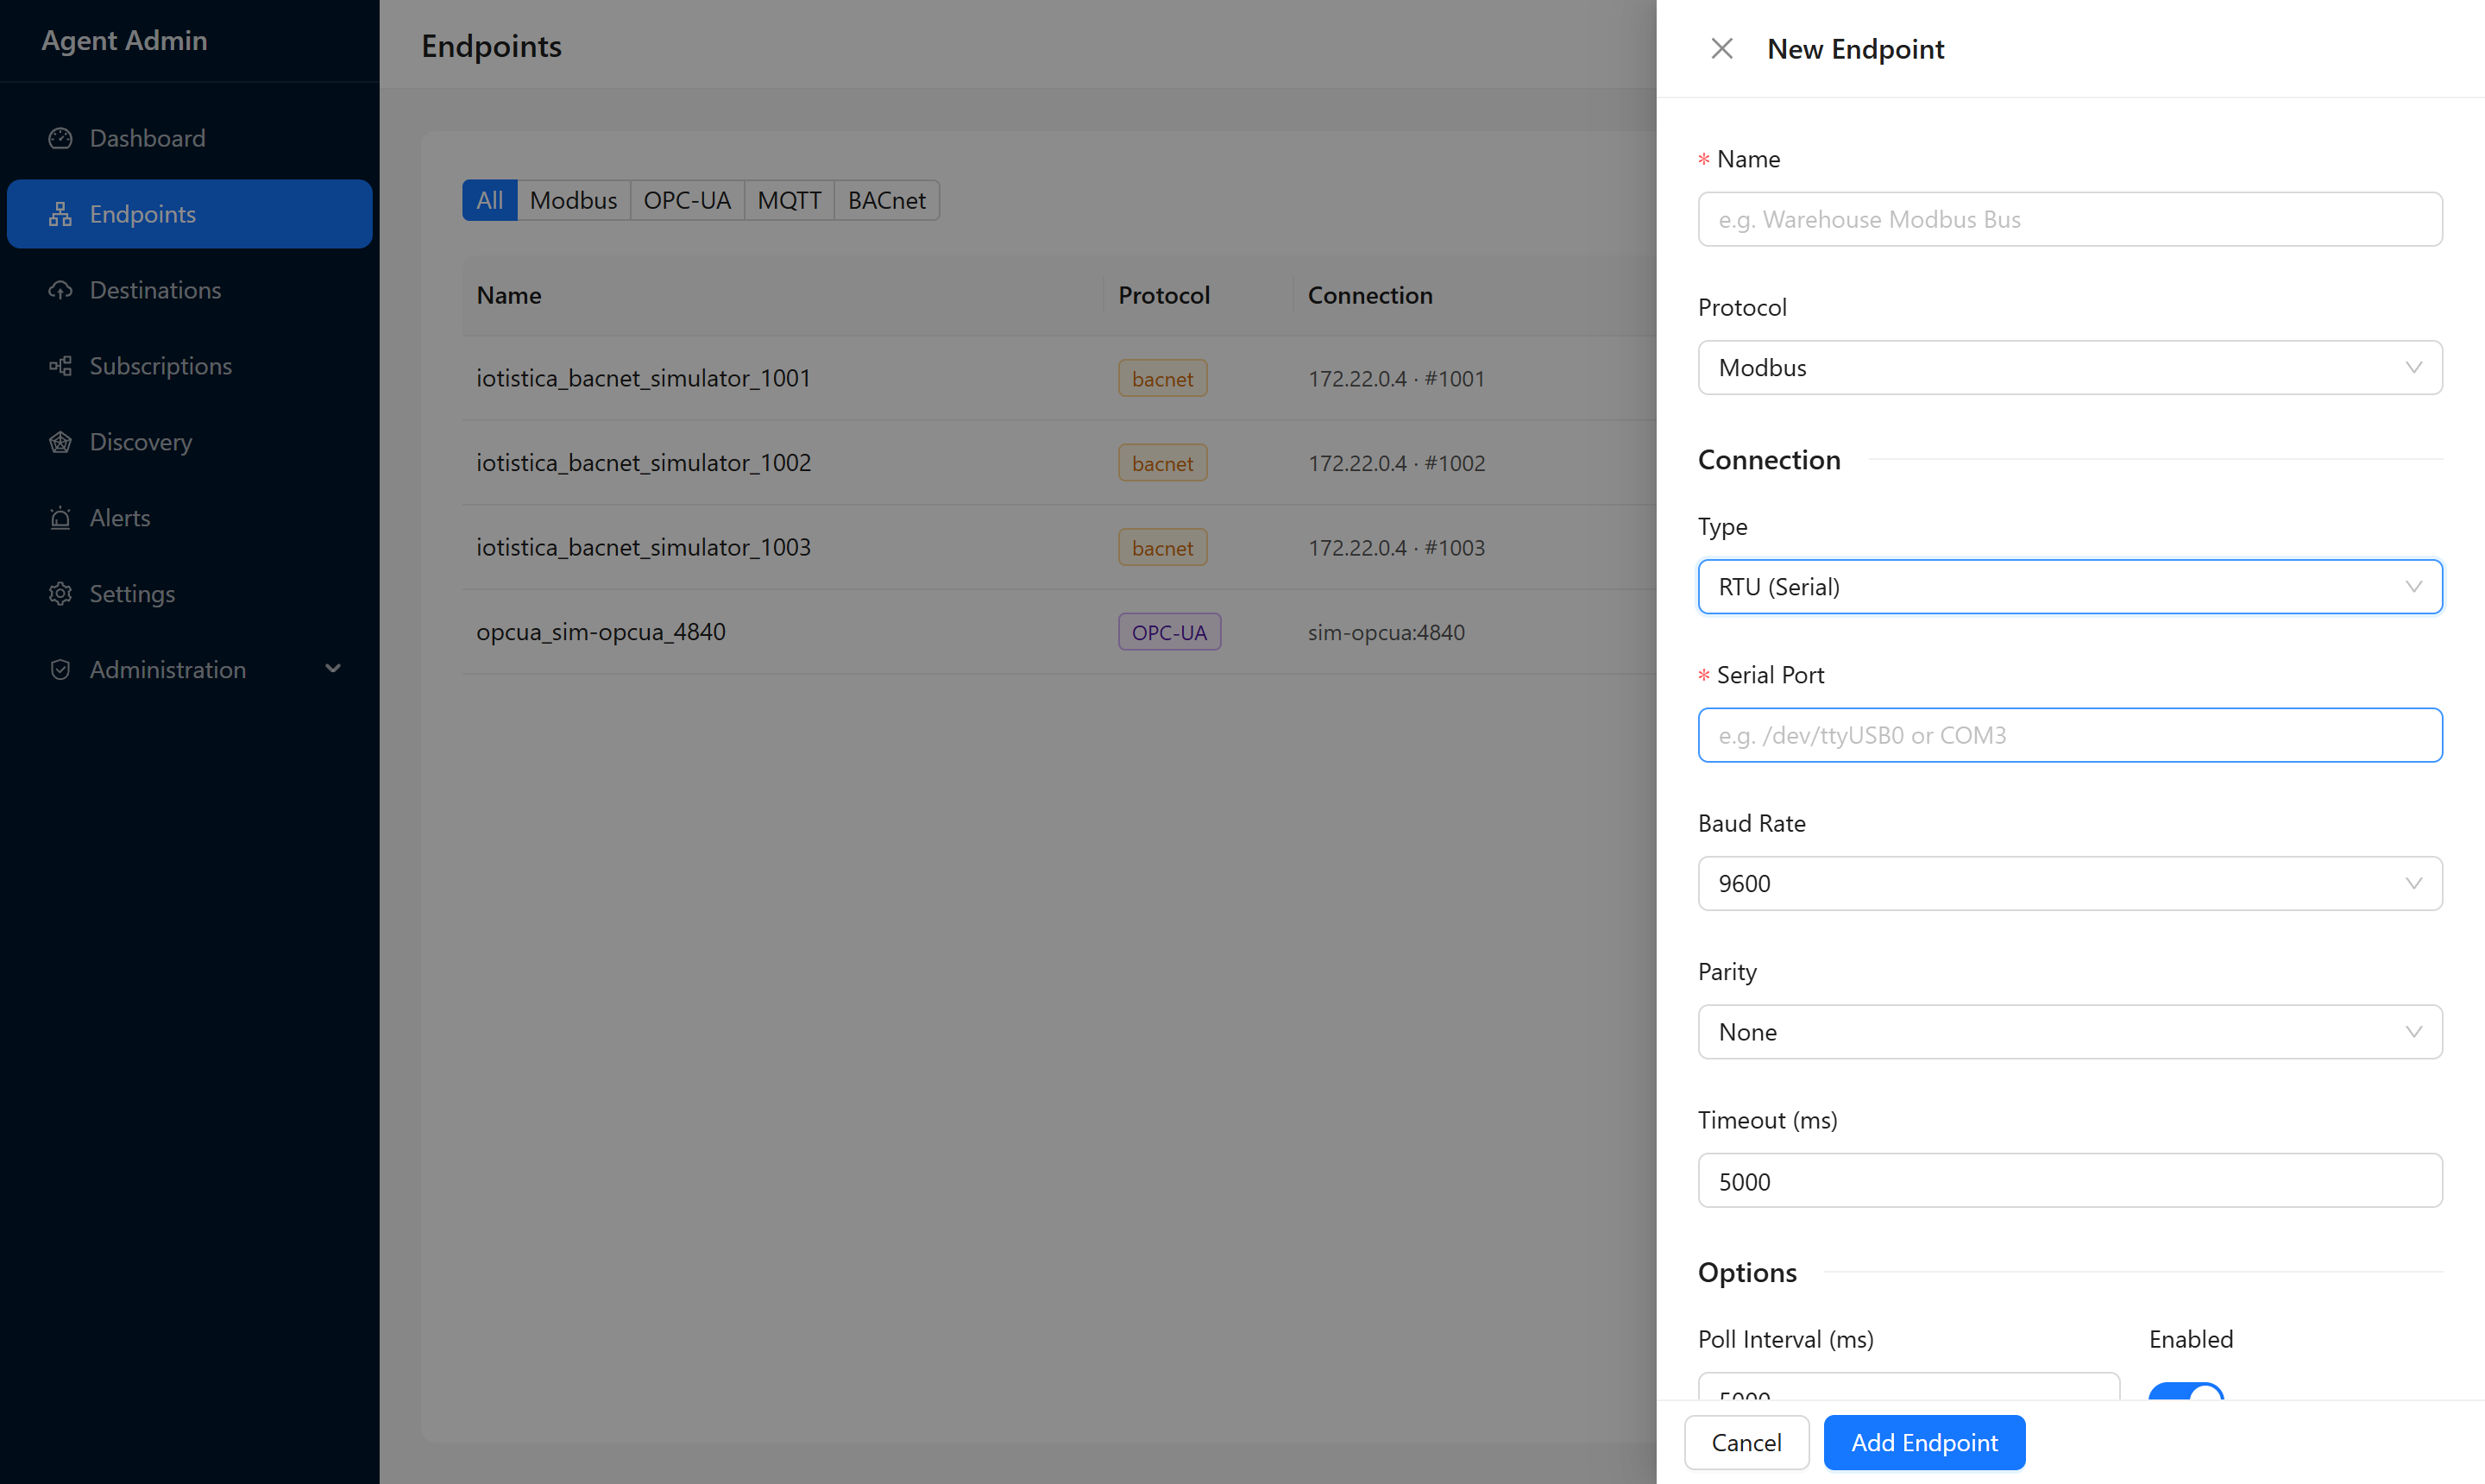
Used for devices connected via RS-485 or RS-232.
| Field | Default | Description |
|---|---|---|
| Type | — | Select RTU (Serial) |
| Serial Port | — | The serial device path, e.g. /dev/ttyUSB0 on Linux or COM3 on Windows |
| Baud Rate | 9600 | Must match the device setting. Common values: 9600, 19200, 38400, 115200 |
| Parity | None | Must match the device: None, Even, or Odd |
| Timeout (ms) | 5000 | Response timeout |
Tip: If you're not sure which /dev/ttyUSB* port your adapter is on, run ls /dev/ttyUSB* in a terminal before adding the endpoint.
Example: A PLC at 9600 baud, no parity, on the first USB serial adapter:
Type:        RTU (Serial)
Serial Port: /dev/ttyUSB0
Baud Rate:   9600
Parity:      None
Timeout:     5000
OPC-UA
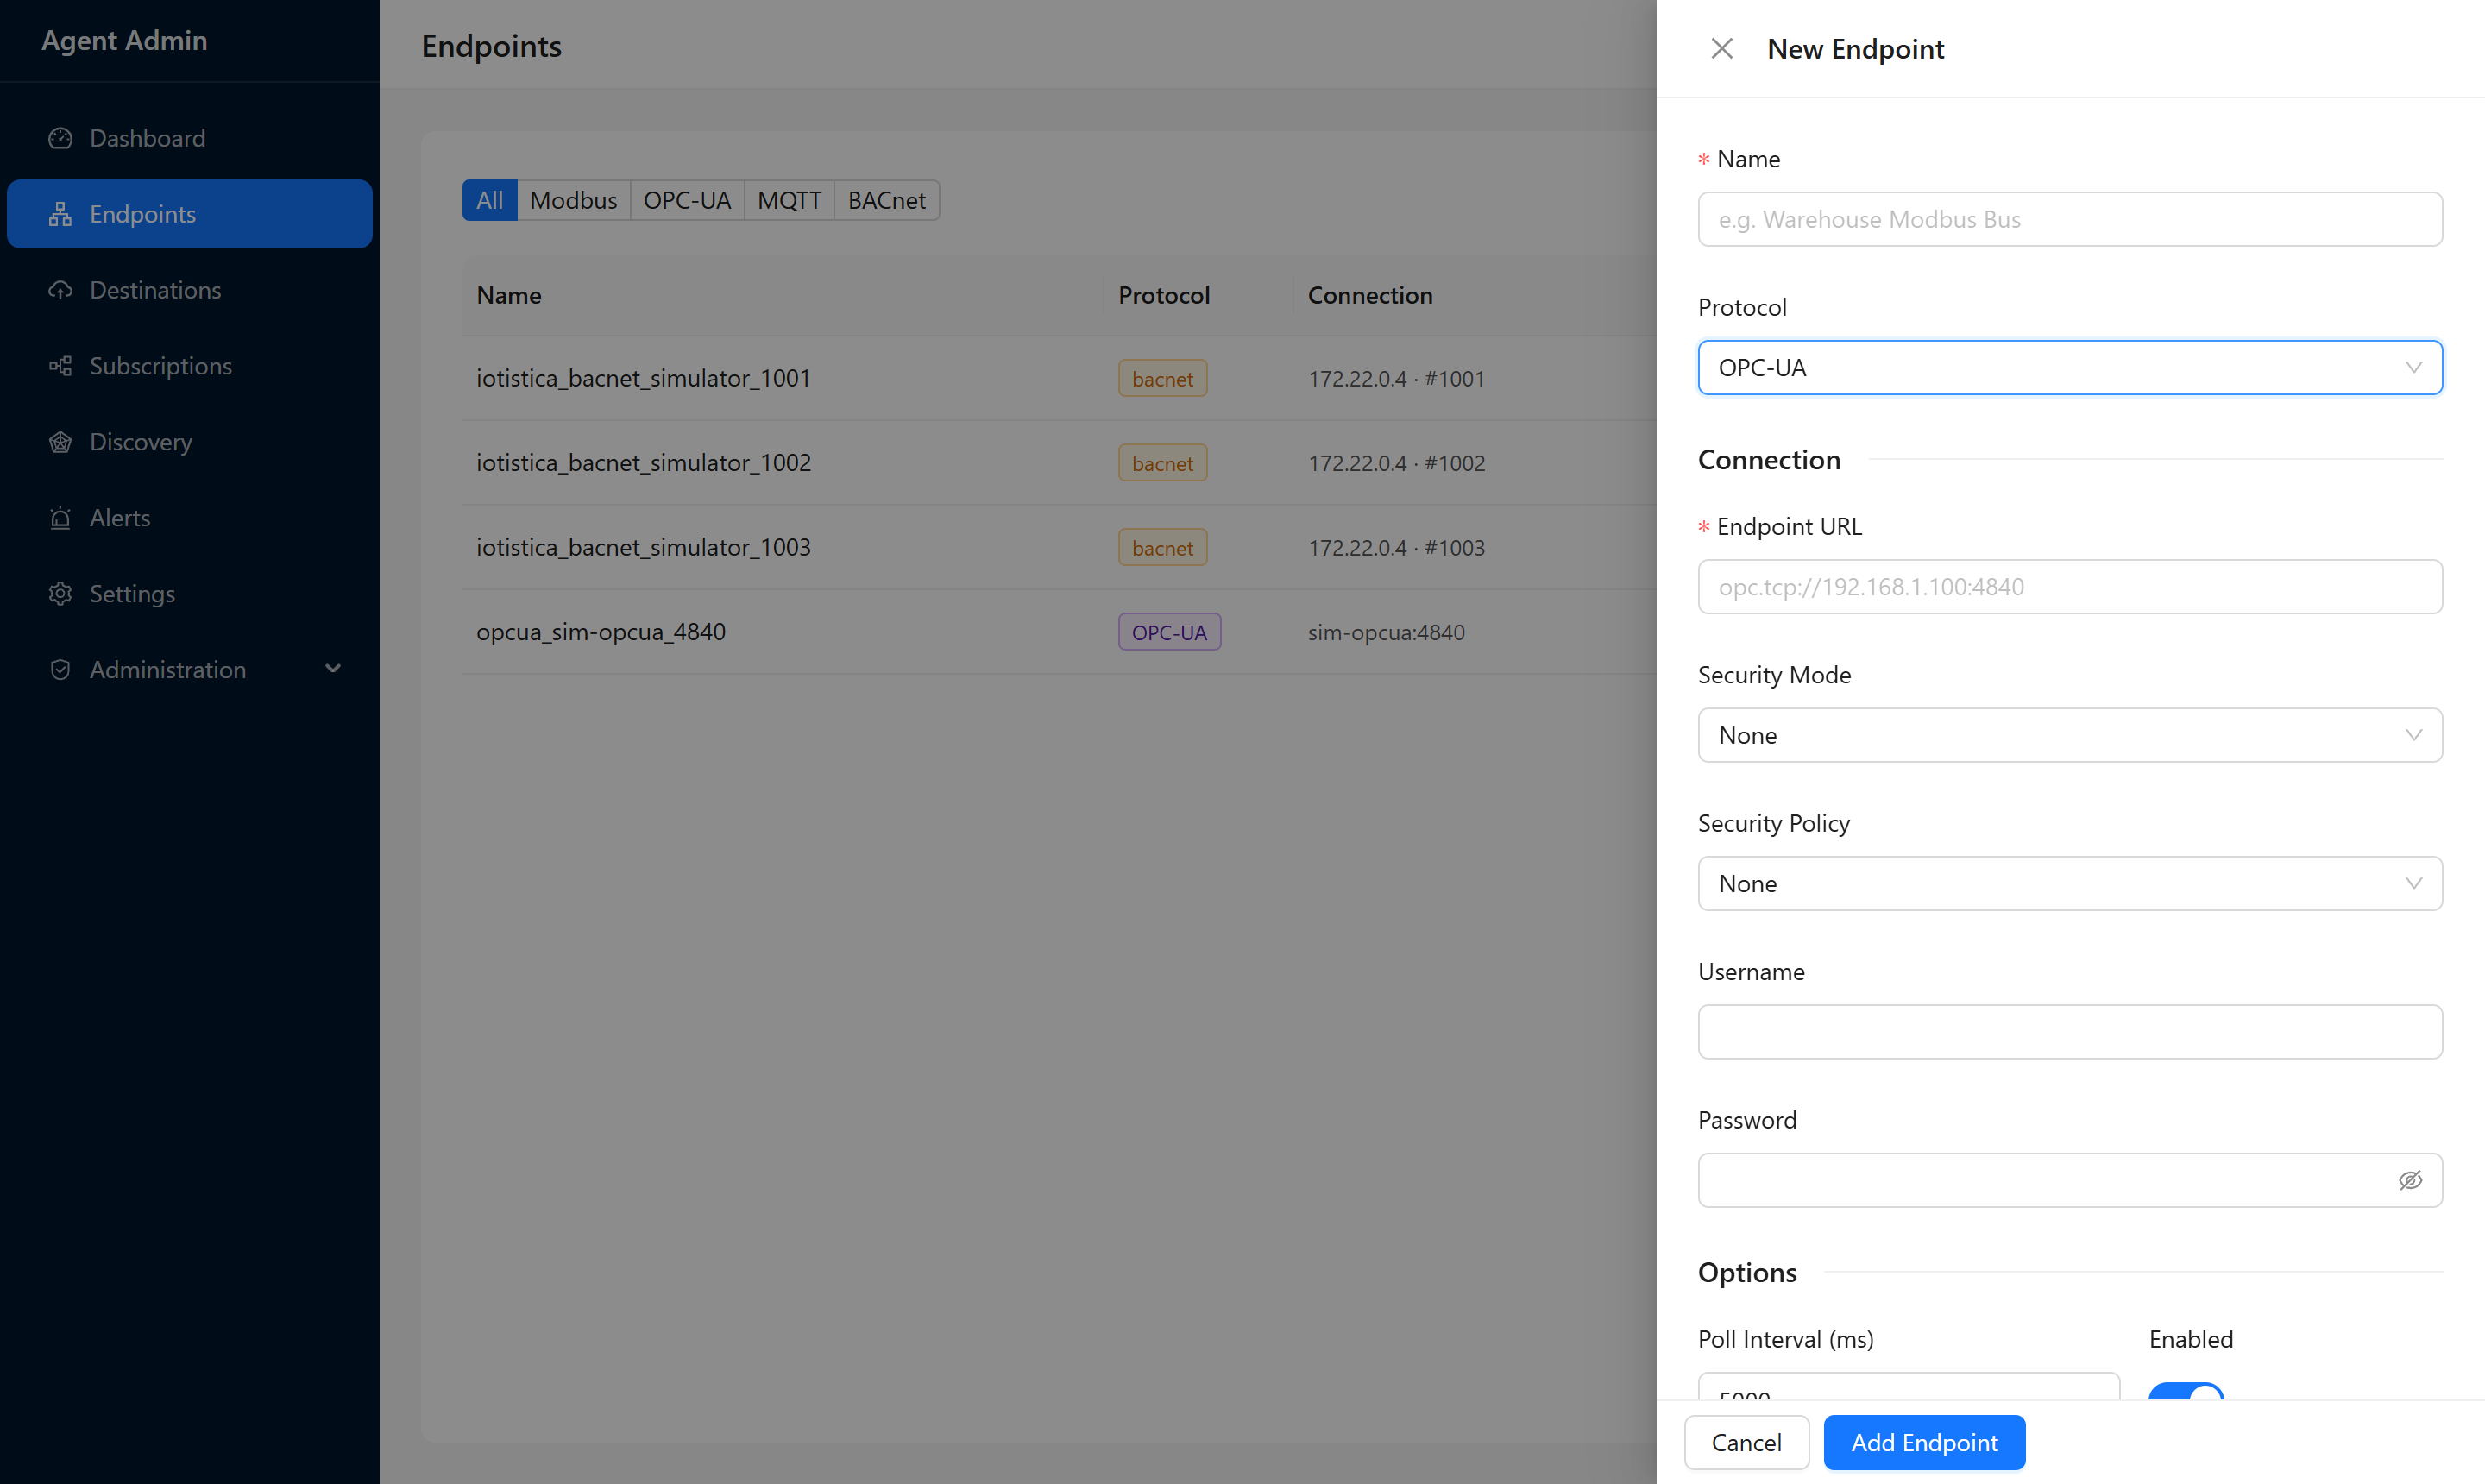
OPC-UA is the modern industrial communication standard, commonly used with SCADA systems, Siemens PLCs, and building management systems.
| Field | Default | Description |
|---|---|---|
| Endpoint URL | — | Full OPC-UA endpoint URL, e.g. opc.tcp://192.168.1.50:4840 |
| Security Mode | None | None = no encryption; Sign = signed messages; Sign & Encrypt = signed and encrypted |
| Security Policy | None | Encryption algorithm. Leave as None unless the server requires security. |
| Username | — | Leave empty for anonymous access |
| Password | — | Password for username/password authentication |
Example: A Siemens S7-1200 PLC with anonymous access:
Endpoint URL:    opc.tcp://192.168.1.50:4840
Security Mode:   None
Security Policy: None
Username:        (empty)
Password:        (empty)
Example: A server that requires authentication:
Endpoint URL:    opc.tcp://192.168.5.10:4840/server
Security Mode:   Sign & Encrypt
Security Policy: Basic256Sha256
Username:        opcuser
Password:        ••••••••
Tip: The endpoint URL is usually shown in the OPC-UA server's configuration page. Port 4840 is the standard default, but some servers use a different port or a path after the port.
MQTT (as a source)

Use this when you have a device or system that already publishes data to an MQTT broker. The agent subscribes to a topic on that broker and ingests whatever it receives.
| Field | Default | Description |
|---|---|---|
| Broker Host | — | Hostname or IP of the MQTT broker, e.g. 192.168.1.100 |
| Port | 1883 | Broker port. Use 8883 for TLS. |
| Username | — | Leave empty for unauthenticated brokers |
| Password | — | Broker password |
| Topic | — | Topic to subscribe to. Wildcards work: sensors/# or factory/line1/+/data |
Example: Subscribing to all temperature sensors published by a local Mosquitto broker:
Broker Host: 192.168.1.100
Port:        1883
Username:    (empty)
Password:    (empty)
Topic:       sensors/temperature/#
BACnet

BACnet devices (HVAC controllers, VAV boxes, thermostats, lighting panels) are best added through the Discovery flow rather than manually — discovery handles the device enumeration automatically.
If you do need to add a BACnet device manually, the drawer shows a raw JSON field. Enter the connection config directly:
{
  "ipAddress": "192.168.1.200",
  "deviceInstance": 1001
}
| Key | Description |
|---|---|
ipAddress | IP address of the BACnet device |
deviceInstance | BACnet device instance number (found in the device's own config) |
Editing an Endpoint
Click the edit (pencil) icon on any row to open the edit drawer. In edit mode, you can change:
- Enabled — toggle data collection on/off without deleting the endpoint
- Poll Interval — change how often readings are taken
Connection settings (host, port, URL, etc.) cannot be changed after creation. To update them, delete the endpoint and re-add it.
Deleting an Endpoint
Click the delete (trash) icon on any row. A confirmation dialog appears before anything is removed.
Deleting an endpoint stops all data collection from that device. Any subscriptions that were routing its data will stop receiving new readings — but the subscriptions themselves are not deleted.
Using the Protocol Filter
The All / Modbus / OPC-UA / MQTT / BACnet buttons at the top of the page filter the table by protocol. The filter is just a view — it doesn't change any configuration. Use it when you have a large number of endpoints and want to focus on one protocol at a time.
Discovering Endpoints Automatically
Instead of entering connection details by hand, you can let the agent scan your network. Click the Discover button next to Add Endpoint.
See Discovery for a full walkthrough.